 Save
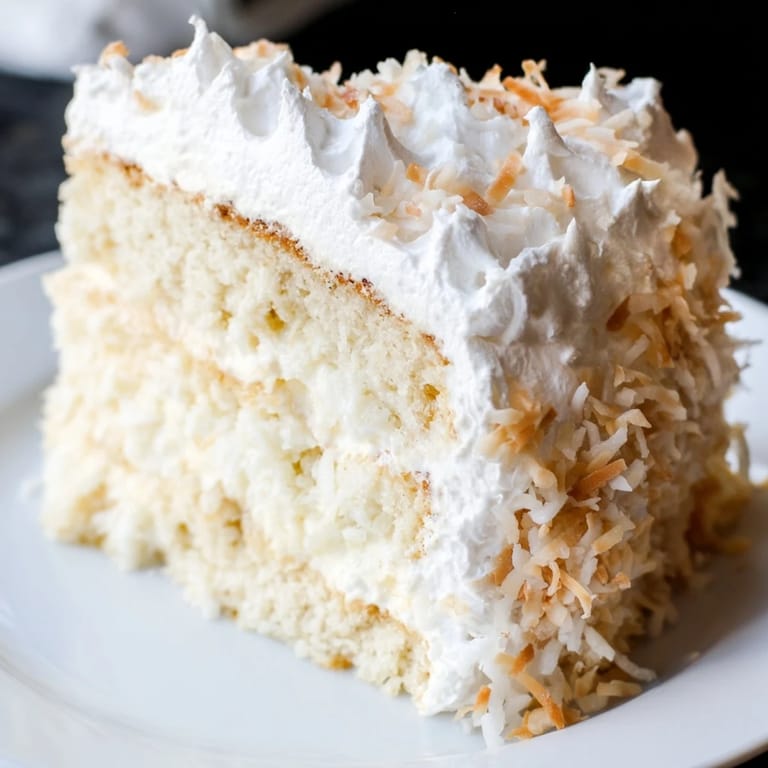
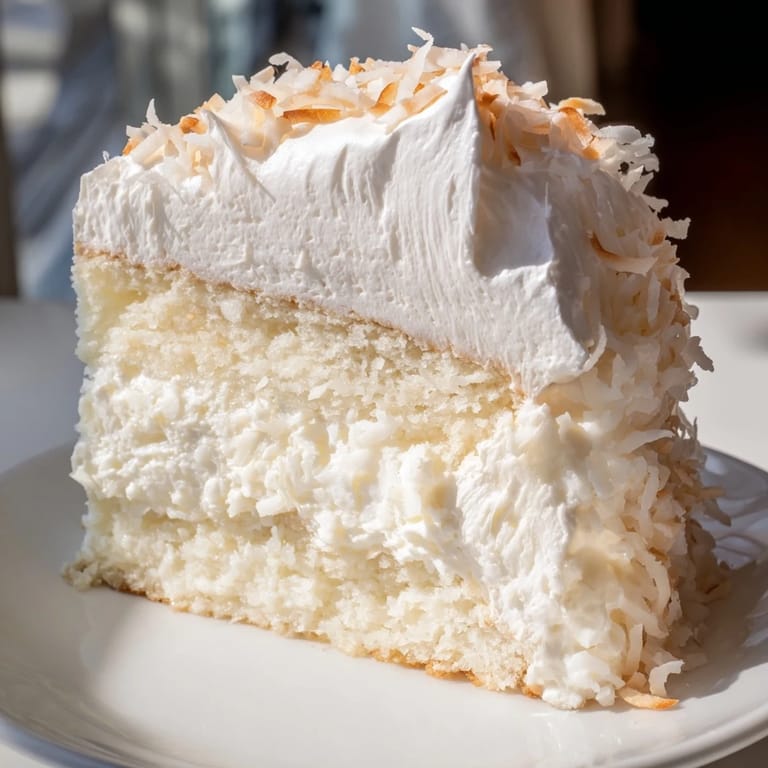
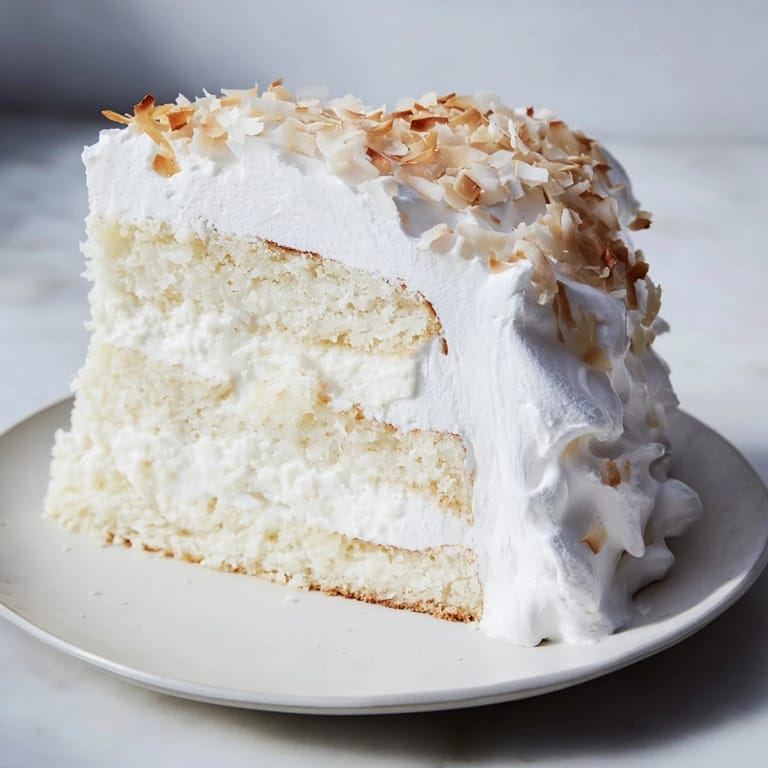
Save There's something about a coconut cake that stops conversations mid-sentence. Years ago, at a garden party on the hottest day of summer, a friend brought a three-layer coconut cake frosted with clouds of meringue, and I watched it disappear faster than the ice in anyone's drink. That moment taught me that the best desserts aren't just about technique—they're about creating something so visually stunning and impossibly tender that people slow down to savor it. Now whenever I bake this cake, I'm chasing that same magic: the way the frosting catches the light, how the coconut filling stays moist between the layers, the gentle sweetness that never feels heavy.
I made this cake for my daughter's birthday last spring, and the kitchen filled with coconut steam rising from the mixing bowl in the most comforting way. She wanted something "fancy but not fussy," and this three-layer beauty was exactly that—elegant enough to feel like a celebration, straightforward enough that I wasn't stressed while making it. When we cut into it and the filling held perfectly between the layers, I felt that small, quiet victory that home bakers live for.
Ingredients
- Cake flour: Using cake flour instead of all-purpose makes these layers tender and delicate; the lower protein content is the reason this cake doesn't end up dense.
- Unsalted butter and room-temperature egg whites: Both need to be at room temperature so they cream together smoothly and incorporate air, which is what gives the cake its feathery crumb.
- Coconut milk for the filling: The unsweetened version keeps the filling balanced; sweetened would push it over into cloying territory.
- Cream of tartar in the frosting: This stabilizes the egg whites and helps them reach that glossy, stiff-peak stage that makes seven-minute frosting look like edible clouds.
- Toasted coconut for decoration: Toasting deepens the flavor and adds a subtle crunch that plain shredded coconut doesn't quite deliver.
Tired of Takeout? 🥡
Get 10 meals you can make faster than delivery arrives. Seriously.
One email. No spam. Unsubscribe anytime.
Instructions
- Set your stage:
- Preheat the oven to 350°F and prepare three 8-inch round pans with a light coating of butter and flour—this step matters more than you'd think because it prevents sticking that can break the delicate layers. Make sure everything you'll need is within arm's reach before you start mixing.
- Build the dry foundation:
- Whisk cake flour, baking powder, and salt together in a bowl; this aerates the flour and distributes the leavening evenly. Set it aside and don't skip this step—it's what keeps you from ending up with dense pockets in the finished cake.
- Cream until clouds form:
- Beat butter and sugar together until the mixture is pale, fluffy, and looks almost like whipped clouds—about 3 minutes on medium-high speed. This is where you're incorporating air into the butter, which creates the cake's tender structure.
- Add eggs with intention:
- Add each egg white one at a time, making sure it's fully incorporated before adding the next; rushing this step can cause the batter to separate. After the last egg white, stir in vanilla extract and let the mixer run for another 30 seconds to blend it in completely.
- The alternating dance:
- Starting and ending with flour, alternate between adding the dry mixture and the milk—flour, milk, flour, milk, flour. Mixing just until combined after each addition keeps the batter tender; overmixing at this stage is one of the few ways this cake can go wrong.
- Divide and bake:
- Pour the batter evenly among the three pans and bake for 25–30 minutes, until the top is light golden and a toothpick inserted in the center comes out clean. The cakes should spring back slightly when you press the top with your finger.
- Cool with patience:
- Let the cakes rest in the pans for 10 minutes—this allows them to set slightly without cooling so much that they stick—then turn them out onto wire racks to cool completely. Don't rush this step; a completely cooled cake is much easier to layer without crumbling.
- Make the coconut filling:
- In a saucepan, combine coconut milk and sugar over medium heat, stirring until the sugar dissolves completely, then remove from heat and stir in the shredded coconut. Let it cool to room temperature; it should be thick but still spreadable, almost like a paste.
- Create the frosting magic:
- Set a heatproof bowl over simmering water (the bowl shouldn't touch the water), add egg whites, sugar, water, and cream of tartar, and beat continuously with a hand mixer on high speed. After about 7 minutes, the frosting will transform into stiff, glossy peaks that hold their shape; this is the moment you remove it from the heat, add vanilla, and beat for 2 more minutes.
- Layer with confidence:
- Place the first cake layer on your serving platter, spread half the coconut filling on top, add the second layer, spread with the remaining filling, and crown it with the third layer. The filling acts as both flavor and structure, helping the layers stay put.
- Frost and decorate:
- Use an offset spatula to frost the entire cake with the seven-minute frosting, then press toasted or plain shredded coconut onto the sides and top. Work gently but confidently; the frosting is sturdy enough to handle.
- Let it set:
- Allow the cake to rest for at least 30 minutes before slicing so the frosting firms up and the layers settle. This final pause is what turns everything into a perfectly sliceable, photogenic cake.
 Save
Save The first time someone told me this cake reminded them of a special occasion from their own past, I realized it had become more than just dessert in our house—it's now the cake we reach for when we want to mark something worth remembering. There's comfort in knowing that one recipe can mean something different to everyone who tastes it.
Why This Cake Works
The three-layer structure isn't just for show; it's practical because thinner layers bake more evenly and cool faster, and they create more surface area for the coconut filling to shine. The combination of coconut milk in the filling and sweetened shredded coconut gives you layers of coconut flavor without any single element becoming overwhelming. The seven-minute frosting stays stable through serving and slicing in a way that other frostings sometimes struggle with, especially on warm days.
Variations Worth Trying
Once you've made this cake once, you might find yourself experimenting. Some bakers swear by replacing half the milk in the cake layers with coconut milk for a richer crumb, though I find the straight version light enough that it doesn't feel like overkill. You can also play with toasted versus plain coconut for decoration depending on the mood—toasted gives a sophisticated nod, plain feels celebratory and bright.
Serving and Storage
This cake is at its absolute best within a few hours of frosting, while the meringue is still cloud-soft and the filling is still moist. It pairs beautifully with black tea or a dry sparkling wine, the way certain combinations just feel inevitable once you've experienced them together. Keep it in a cake keeper or loosely covered at room temperature; refrigeration can make the frosting sticky and the cake texture dense, so avoid the fridge unless your kitchen is genuinely sweltering.
- Slice with a warm, wet knife for clean cuts that honor all three layers.
- Leftovers keep at room temperature for up to two days, though the frosting will soften and the cake will dry slightly with time.
- This isn't a cake that freezes well because of the meringue frosting, so make it when you're ready to serve it.
 Save
Save This coconut cake is the kind of recipe that rewards you for showing up and following the steps with intention. Make it once, and you'll understand why it keeps appearing at celebrations, why people ask for the recipe, and why you'll find yourself making it again.
Recipe FAQ
- → What flour is best for this cake?
Use cake flour to ensure a tender and delicate crumb that's light and soft.
- → How is the coconut filling prepared?
Simmer coconut milk with sugar, then stir in shredded coconut until thick and spreadable, allowing it to cool before use.
- → What makes the seven-minute frosting unique?
It’s made by whipping egg whites, sugar, and cream of tartar over simmering water until stiff and glossy peaks form, resulting in a light and airy topping.
- → Can I substitute ingredients for richer flavor?
Replacing half the milk in the batter with coconut milk adds depth and intensifies the coconut notes.
- → How should the cake be stored after assembly?
Keep the cake refrigerated and consume on the same day the frosting is made for optimal texture and freshness.