 Save
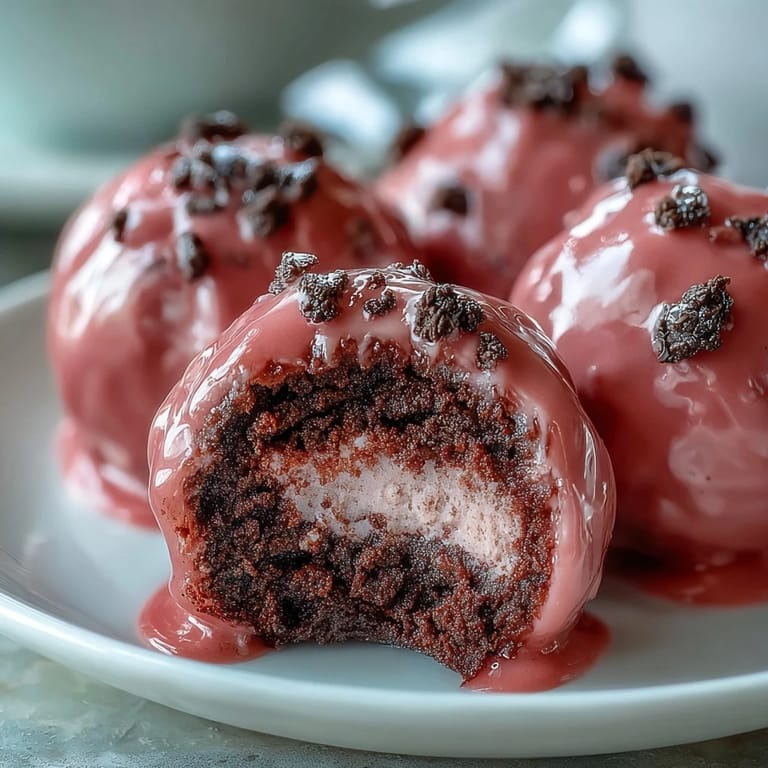
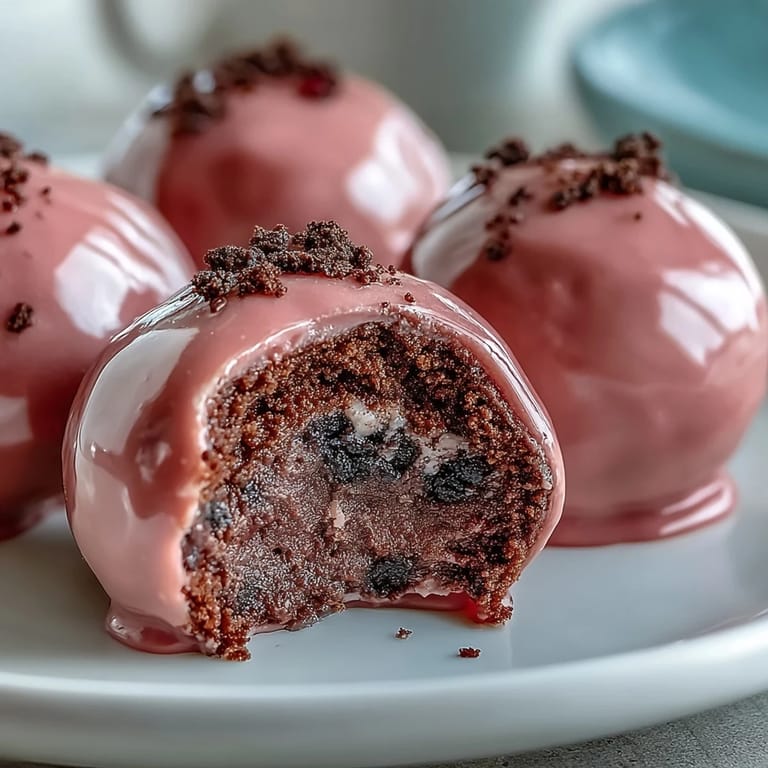
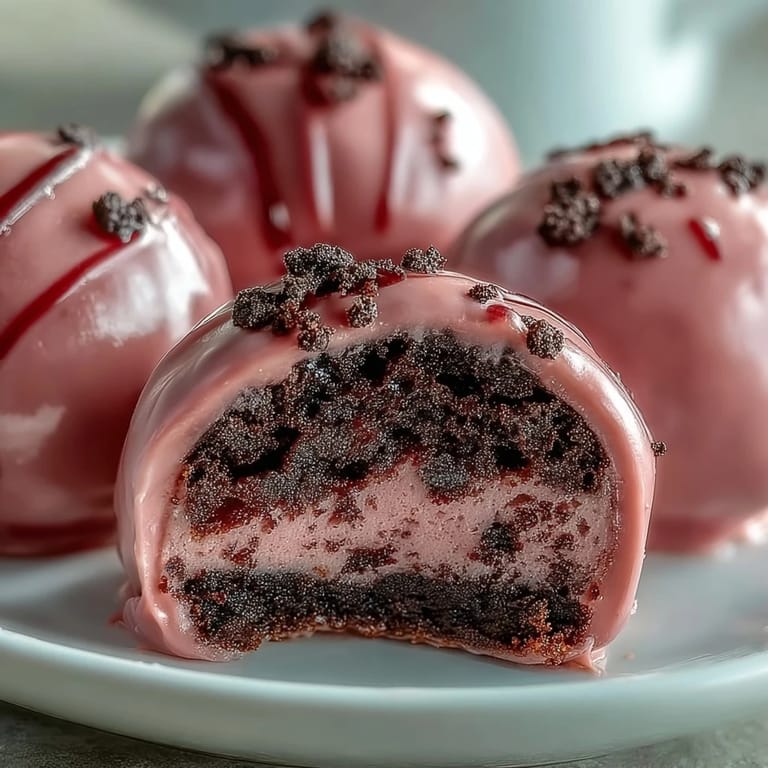
Save My sister brought a tray of these to a baby shower last spring, and I watched them disappear before the cake even made it to the table. The pink coating cracked under gentle pressure, revealing that unmistakable dark Oreo filling that somehow tasted even better in truffle form. I asked for the recipe on the spot, convinced it would involve tempering chocolate or some other pastry school technique. She laughed and told me it was two ingredients plus candy melts. I made my first batch that weekend and haven't stopped since.
I brought a batch to my nephew's birthday party, and the kids lined up like I was handing out concert tickets. One little girl held hers up to the light, fascinated by the way the pink shell glowed, then bit into it with the kind of reverence usually reserved for opening presents. My brother later told me she asked if I could make them again for her own birthday three months away. That's when I realized these weren't just truffles, they were tiny edible celebrations that made people feel special without any fuss.
Ingredients
- Oreo cookies: Use the whole cookie, filling and all, for that signature chocolate cream flavor that defines these truffles, and make sure they're at room temperature so they blend smoothly without clumping.
- Cream cheese: Soften it completely on the counter before mixing or you'll end up with lumps that never quite disappear, and full fat works best because it creates that silky, truffle like texture.
- Pink candy melts: These give you a smooth, vibrant coating that sets firm without the fuss of tempering real chocolate, and a little vegetable shortening stirred in makes them flow like silk.
- Vegetable shortening: Just a teaspoon thins out thick candy melts and adds a glossy finish that looks professionally dipped.
- Sprinkles or edible pearls: A small decorative touch while the coating is still wet turns simple truffles into something that feels like a gift.
Tired of Takeout? 🥡
Get 10 meals you can make faster than delivery arrives. Seriously.
One email. No spam. Unsubscribe anytime.
Instructions
- Crush the cookies:
- Pulse the Oreos in a food processor until they turn into fine, dark crumbs with no chunks remaining. If you don't have a processor, seal them in a sturdy bag and roll over them with a pin until they're powdery.
- Mix in the cream cheese:
- Add the softened cream cheese to the crumbs and stir with a sturdy spatula until the mixture turns uniformly dark and holds together like dough. It should feel smooth and slightly sticky, not crumbly.
- Shape the truffles:
- Scoop out tablespoon sized portions and roll them between your palms into neat, firm balls. Line them up on a parchment covered baking sheet as you go.
- Chill until firm:
- Pop the tray into the fridge for 30 minutes or the freezer for 15, just until the truffles feel solid enough to dip without falling apart. Cold truffles coat more cleanly and keep their shape.
- Melt the candy coating:
- Microwave the pink candy melts in a bowl at half power in 30 second bursts, stirring after each interval until smooth and glossy. Stir in the shortening if the coating seems thick.
- Dip each truffle:
- Use a fork to lower each chilled ball into the melted candy, roll it to coat completely, then lift and tap gently against the bowl's edge to shake off excess. Slide it back onto the parchment.
- Decorate while wet:
- Sprinkle on any decorations immediately, before the coating begins to set. The candy hardens fast, so work quickly and confidently.
- Let them set:
- Allow the truffles to sit at room temperature until the coating turns firm and matte, or speed things up with 10 minutes in the fridge. Once set, they're ready to serve.
- Store and serve:
- Keep finished truffles in an airtight container in the refrigerator for up to a week. Serve them cold for the best snap and creaminess.
 Save
Save I made a batch for a coworker's going away party, and she tucked one into a napkin to save for her train ride home. She texted me that night from somewhere outside the city, saying she'd just bitten into it and it tasted exactly like the farewell she didn't want to say out loud. Sometimes a little pink truffle does more than taste good, it holds a moment in place long enough to remember it properly.
Choosing Your Coating Color
Pink works beautifully for showers and spring gatherings, but I've also made these in deep red for Valentine's Day, pastel blue for a baby boy celebration, and even metallic gold for New Year's Eve. The truffle inside stays the same, but the color completely shifts the mood and makes people assume you spent hours customizing the recipe. You can buy pre tinted candy melts or start with white ones and add a few drops of oil based food coloring, stirring until you reach the shade you want. Just remember that water based coloring will ruin the candy melts, so always check the label before you squeeze.
Making Them Ahead
I often roll and chill the truffle balls a day or two before I need them, then dip and decorate them the morning of an event. The uncoated balls hold beautifully in the fridge, covered loosely with plastic wrap, and dipping them fresh means the coating stays glossy and smooth. If you need to make them even further ahead, you can freeze the shaped truffles in a single layer on a tray, then transfer them to a freezer bag once solid. Thaw them in the fridge for a few hours before dipping, and they'll taste just as good as if you'd made them that day.
Serving and Presentation
These truffles look especially elegant arranged in small paper cups or displayed on a tiered stand, and a light dusting of edible glitter or a drizzle of contrasting candy melt color takes them from homemade to bakery level. I like to serve them straight from the fridge so the coating stays crisp and the center feels cool and creamy against your tongue. If you're gifting them, layer them between sheets of parchment in a pretty box and tie it with ribbon, no one will believe you didn't buy them from a fancy chocolate shop.
- Arrange them in mini cupcake liners for easy grab and go serving at parties.
- Drizzle a contrasting candy melt color over the top in thin zigzag lines for a professional finish.
- Store them in a single layer to prevent the coating from scratching or losing its shine.
 Save
Save Every time I pull a tray of these from the fridge, I'm reminded that the best recipes aren't always the most complicated ones. They're the ones that make people pause mid conversation, reach for seconds, and ask if you'll please make them again soon.
Recipe FAQ
- → How long should I chill the truffle balls before dipping?
Chill the formed truffle balls in the refrigerator for 30 minutes or in the freezer for 15 minutes until firm to the touch. Proper chilling prevents the balls from losing their shape when dipped into the warm candy coating.
- → Can I use white chocolate instead of candy melts?
Candy melts work best for coating because they're formulated to harden properly and create a stable shell. White chocolate can be used but may remain soft at room temperature and requires tempering for the best results.
- → Why is my candy coating too thick?
If your candy coating seems thick, stir in 1 teaspoon of vegetable shortening to achieve a smoother, more dippable consistency. This helps create an even, thin layer around each truffle.
- → How should I store the finished truffles?
Store the completed truffles in an airtight container in the refrigerator for up to one week. The cool temperature keeps the candy coating firm and the creamy center fresh. Serve chilled for the best texture and flavor.
- → Can I customize the coating color?
Absolutely! Use white candy melts and tint them with oil-based food coloring in any shade you prefer. Avoid water-based coloring as it will cause the candy to seize and become unusable.
- → What's the best way to crush the Oreos?
A food processor creates the finest, most uniform crumbs in seconds. Alternatively, place the cookies in a sealed zip-top bag and crush with a rolling pin until you achieve a sandy texture with no large cookie pieces remaining.